Tailwind Create Review (Jul, 2024): Making Pins Using Tailwind Create

by Abhigyan

You’ve just finished your new blog post and are now ready to promote it on Pinterest.

But you can’t just use the pin templates from your last blog post and replace their headlines and images because Pinterest favors unique, fresh pins for each piece of content.

So what can you do to create a batch of eye-catching pins fast?

Let me introduce you to Tailwind Create, the nifty tool that creates stunning pins in minutes. And yes, I’m talking about pins that stand out and make people want to click.

Not only pins, you can also make beautiful images and designs for Facebook as well as Instagram by using Tailwind Create.

In this Tailwind review and tutorial, you’ll learn how Tailwind can help you to create and schedule eye-catching pins, maximize your reach, and bring tons of traffic from Pinterest.

Disclosure: Some of the links I share might be affiliate links. If you click on one and make a purchase, I may earn a small commission as a thank you. But don’t worry, it won’t cost you anything extra. I only recommend stuff I genuinely believe in. Your support helps me keep creating awesome content. You can read my full affiliate disclosure in my disclaimer page.

If you are a new blogger, you might be wondering what Tailwind really is. Simply put, Tailwind is considered one of the best scheduling tools for Pinterest.

Tailwind helps you to generate and upload images quickly and schedule your pins at the optimal time as per your audience behavior.

You can also measure and analyze how your pins are performing and reach new audiences via Tailwind Communities.

Some of you might have heard about it and wondering whether is it worth your money and does it actually helps you grow your Pinterest traffic.

Tailwind-review-official-partner-Pinterest
Tailwind Is An Official Pinterest Partner

The most important thing you need to know about Tailwind is that it’s an official Pinterest partner. 

There are a few other authorised scheduling tools that work for Pinterest but Tailwind is the most comprehensive.

Moreover, Pinterest works with Tailwind pretty closely to make sure that all the new features are in line with Pinterest spam policy.

If you are on the fence about getting a paid version of Tailwind, this article will explain why I think that Tailwind is worth the investment.

I will also show you how to avoid getting your account in trouble with Pinterest spam filters when you use Tailwind. 

What Problems Does Tailwind Solve?

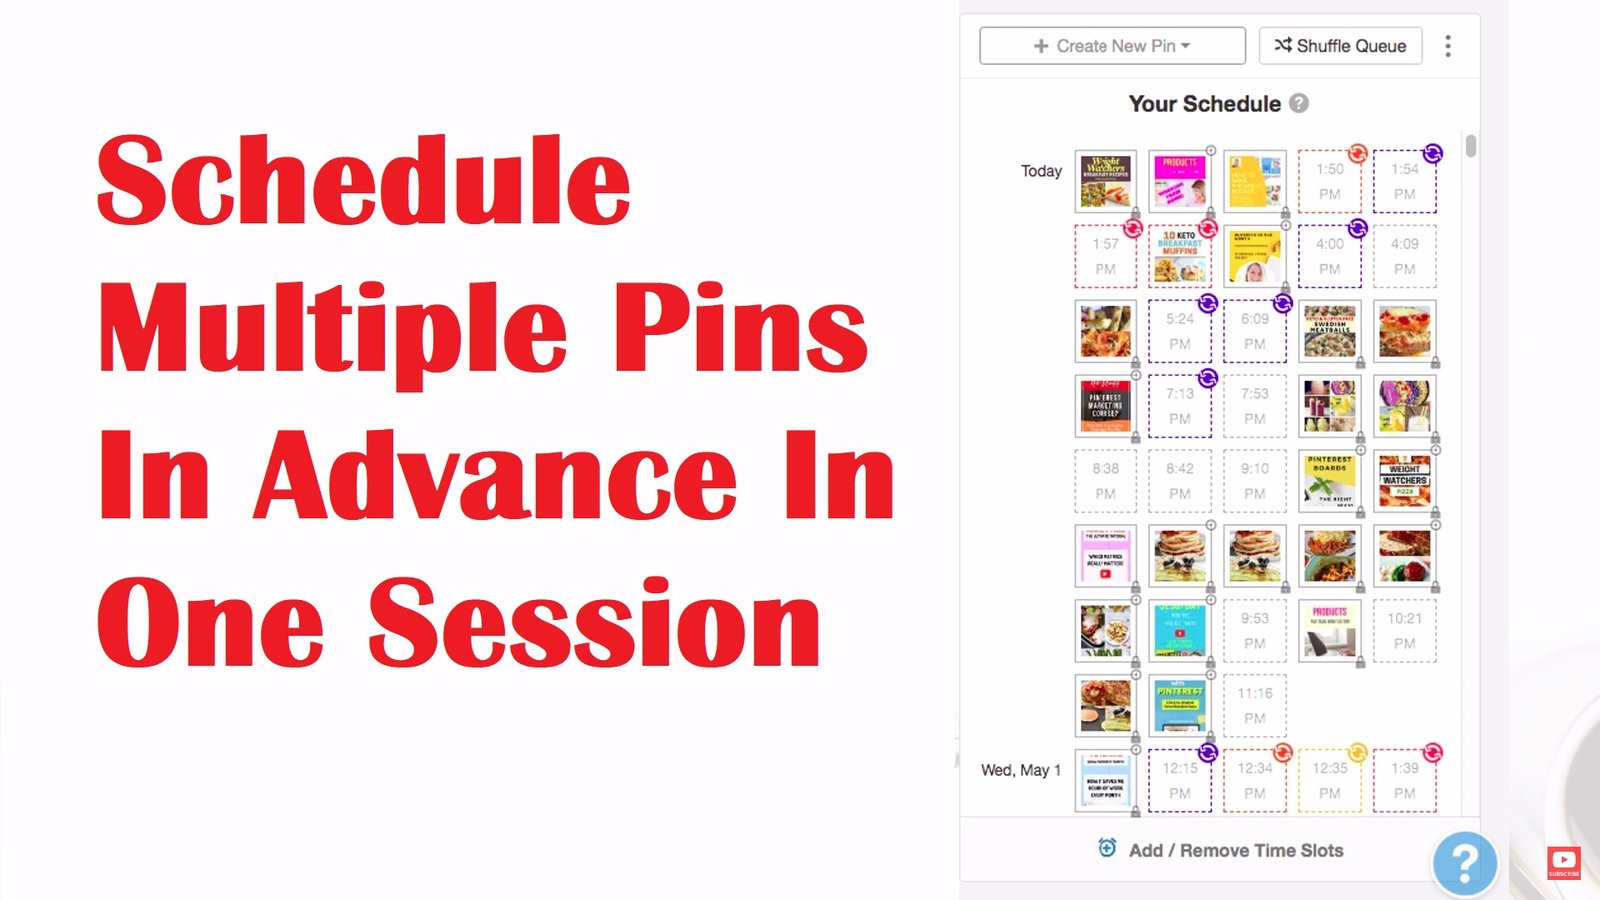
One thing you might be not realizing about Pinterest as a beginner is that you don’t post on this platform just once a day or even twice a day.

Posting 10-30 pins a day or even higher than this is a very common practice on Pinterest.

Keeping up with this pace of pinning and doing all of this manually can easily become a full-time job unless you want to find a smarter way.

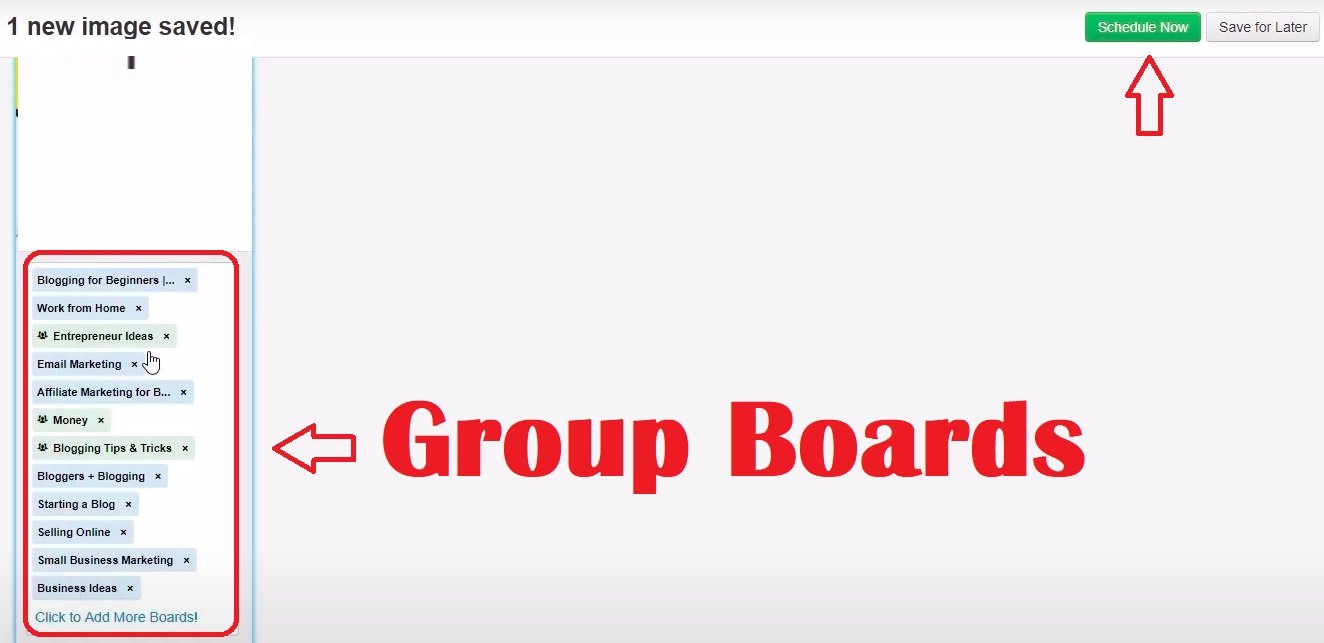
When you’re driving a lot of traffic from Pinterest, managing over a hundred boards on Pinterest, and simultaneously creating multiple pin versions for each of your blog posts, you will soon realize that you need help to keep you sane.

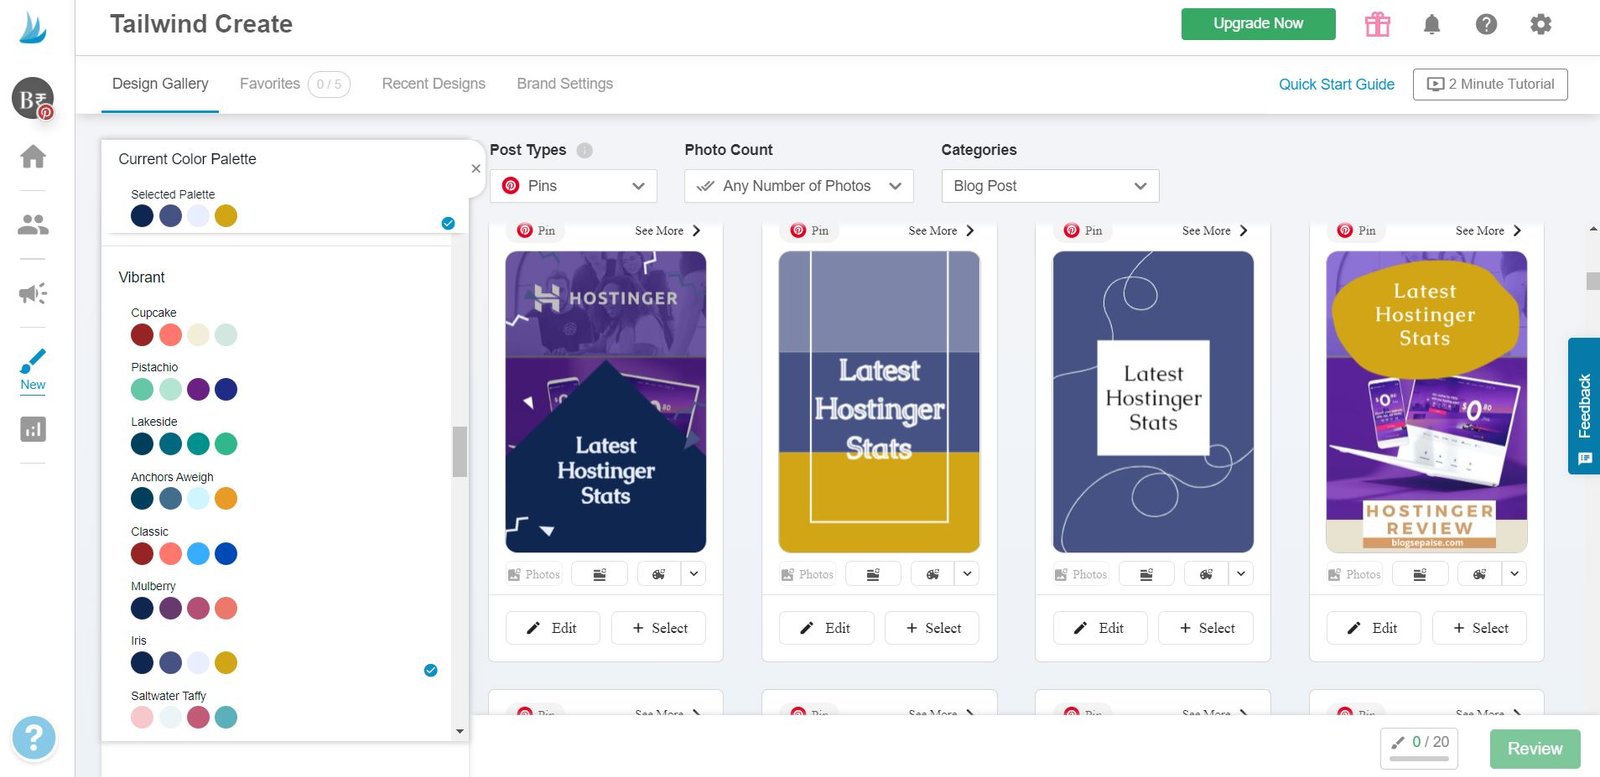
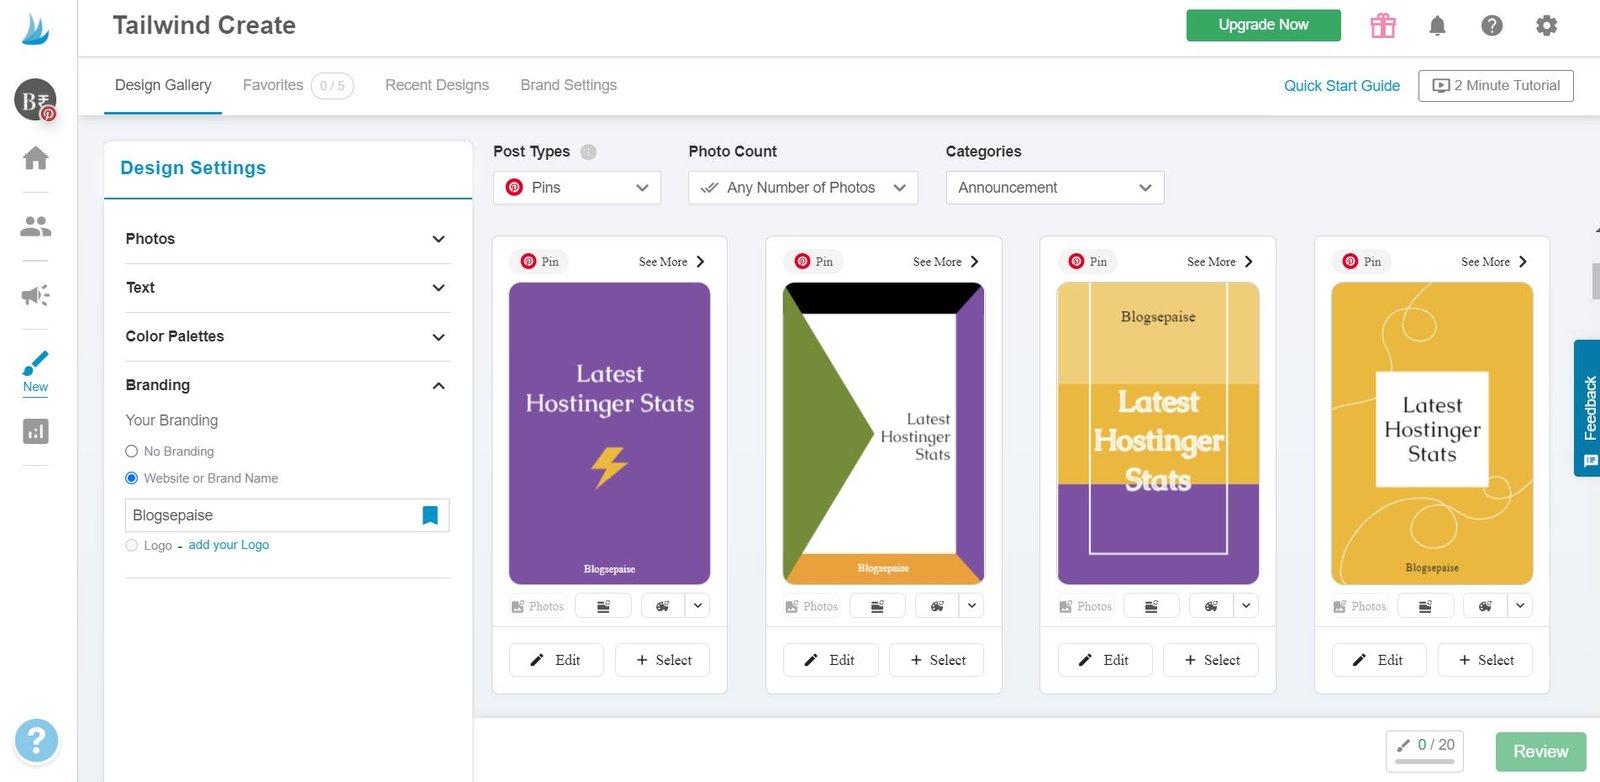
Tailwind makes it easier and quicker to save your own pins on multiple boards on Pinterest. Also, you can save pins of other people to keep your boards active.

Sometimes, you don’t have enough of your own content or maybe you don’t publish enough content for some of your boards. Sometimes, you just have a couple of pages related to a specific topic but you still need to keep your boards active.

This is where Tailwind comes into play and it’ll solve both of these problems.

To save your own pins on multiple boards on Pinterest, you can use

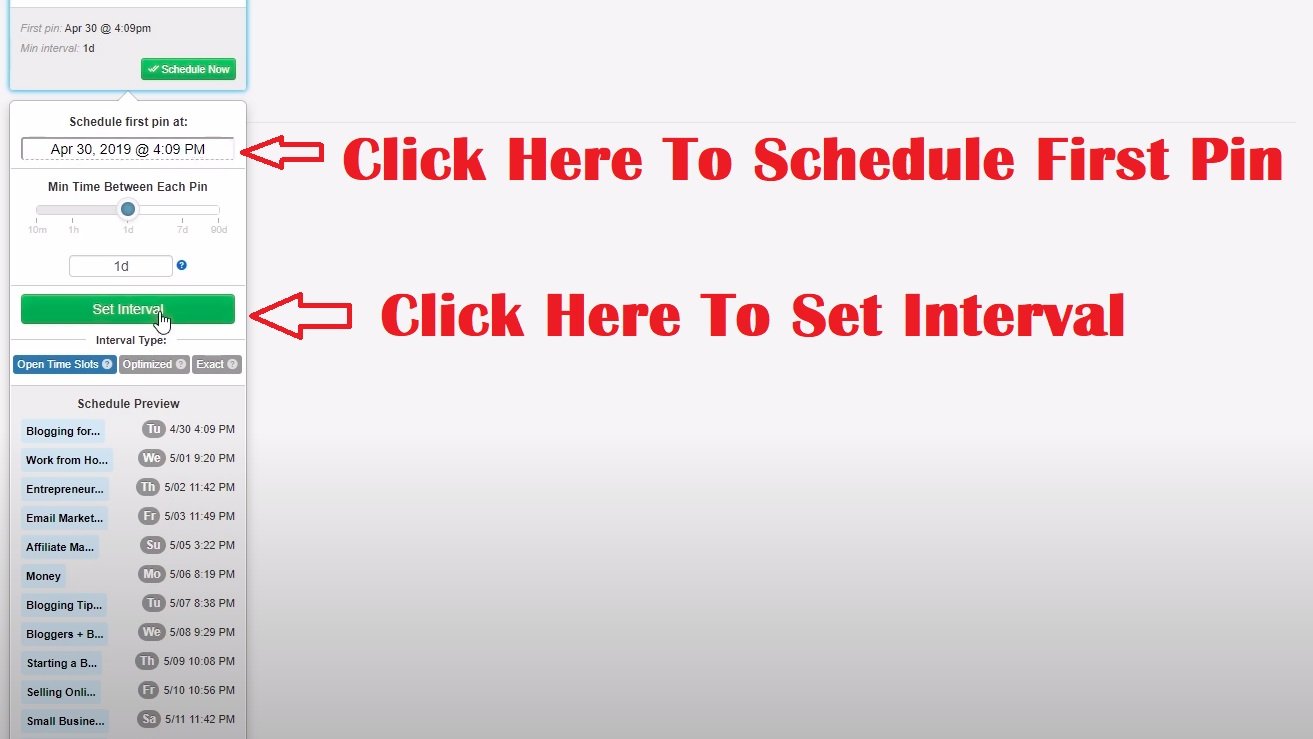
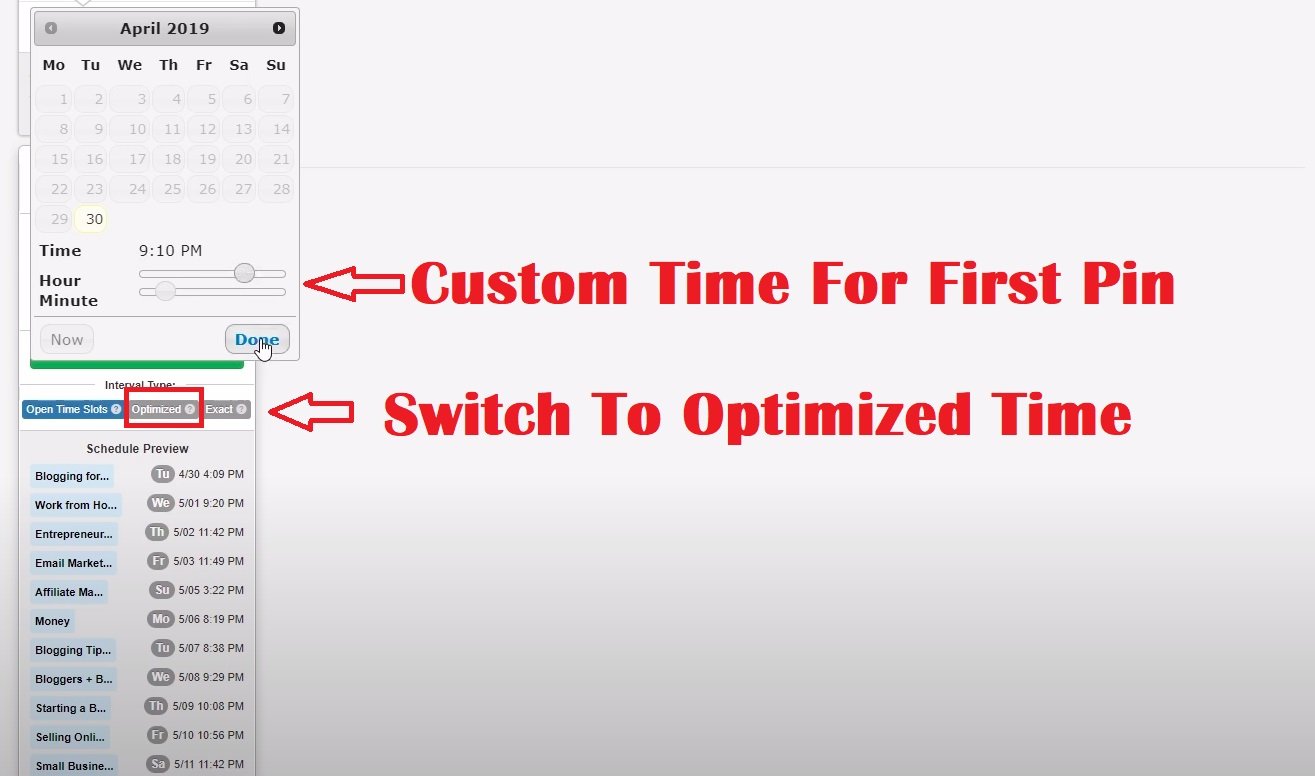
  • The regular scheduling tool with lists boards.
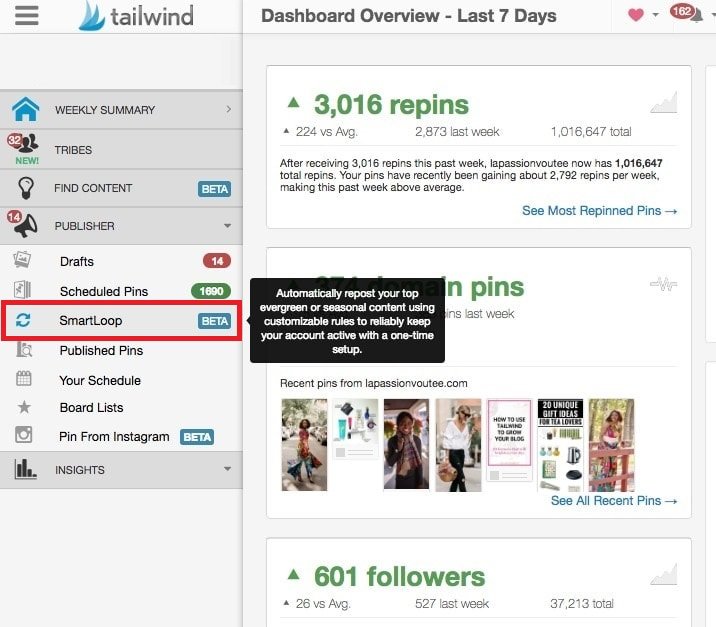
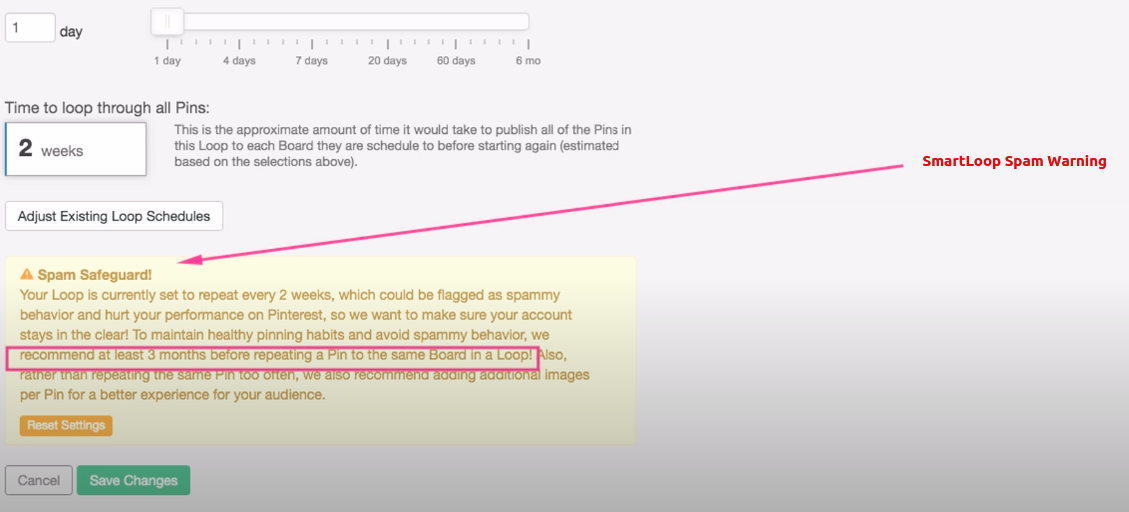
  • The Smart Loop feature with boards set inside of the loop.

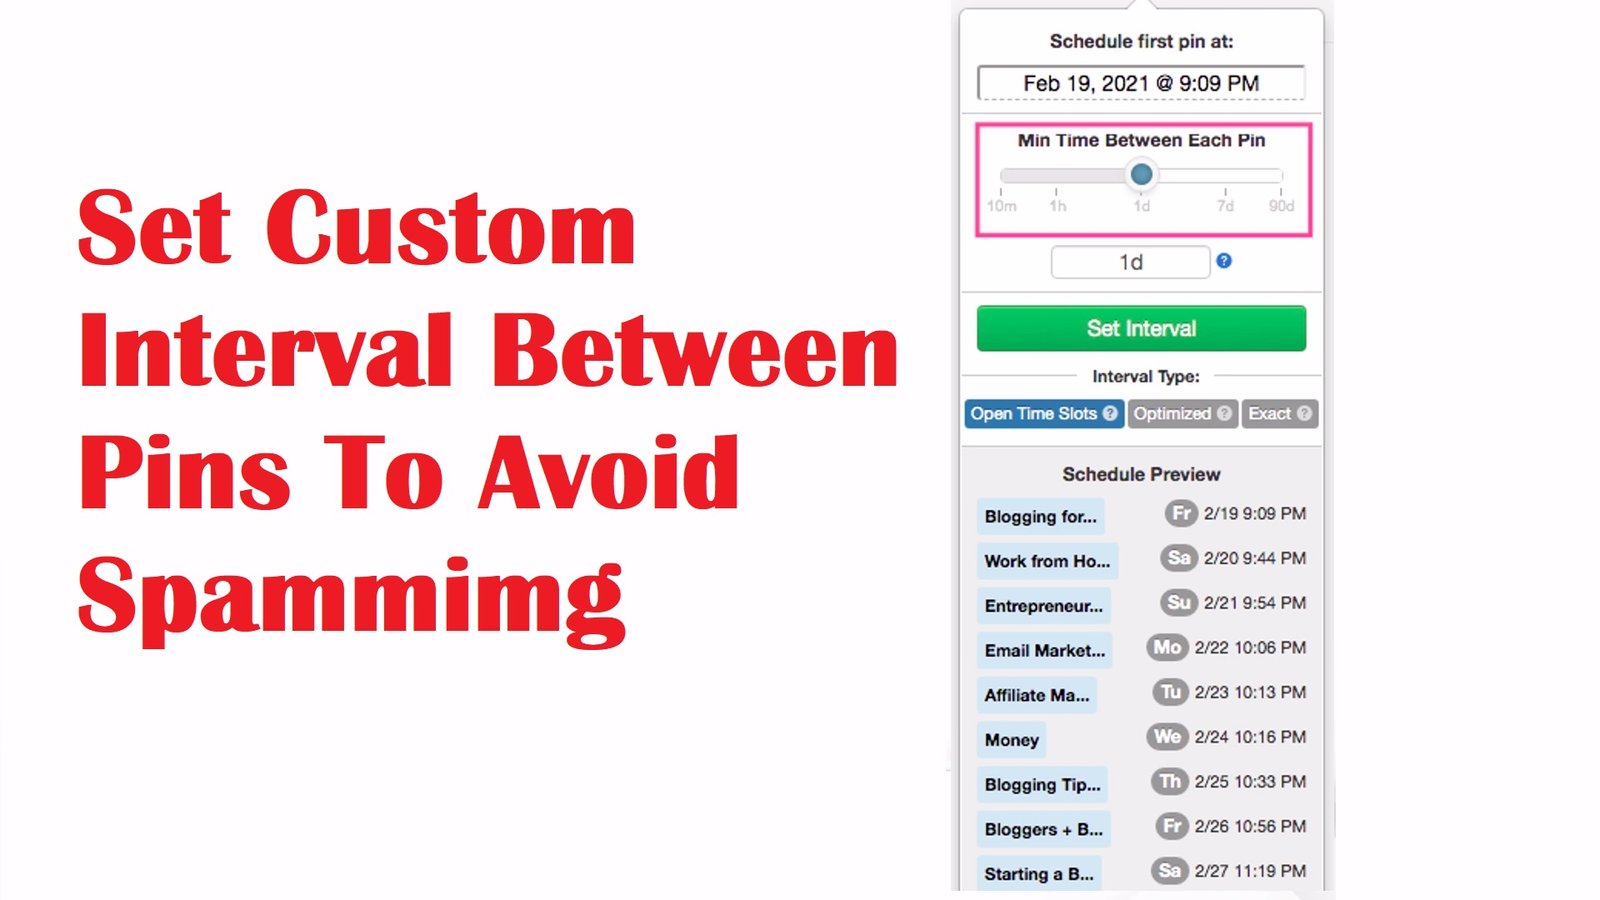
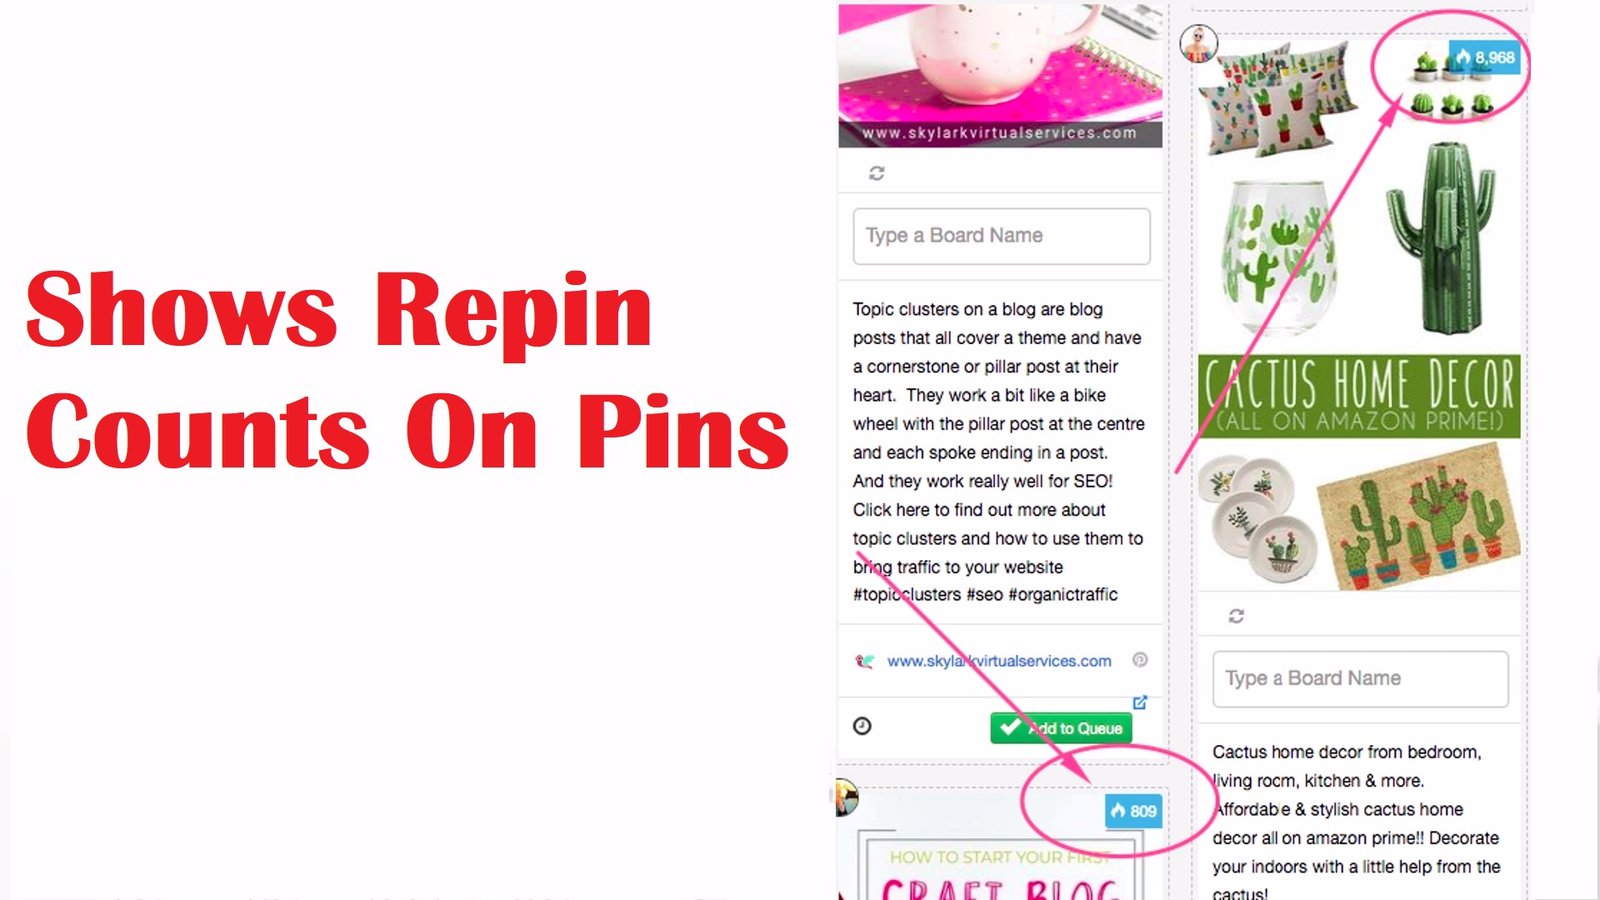
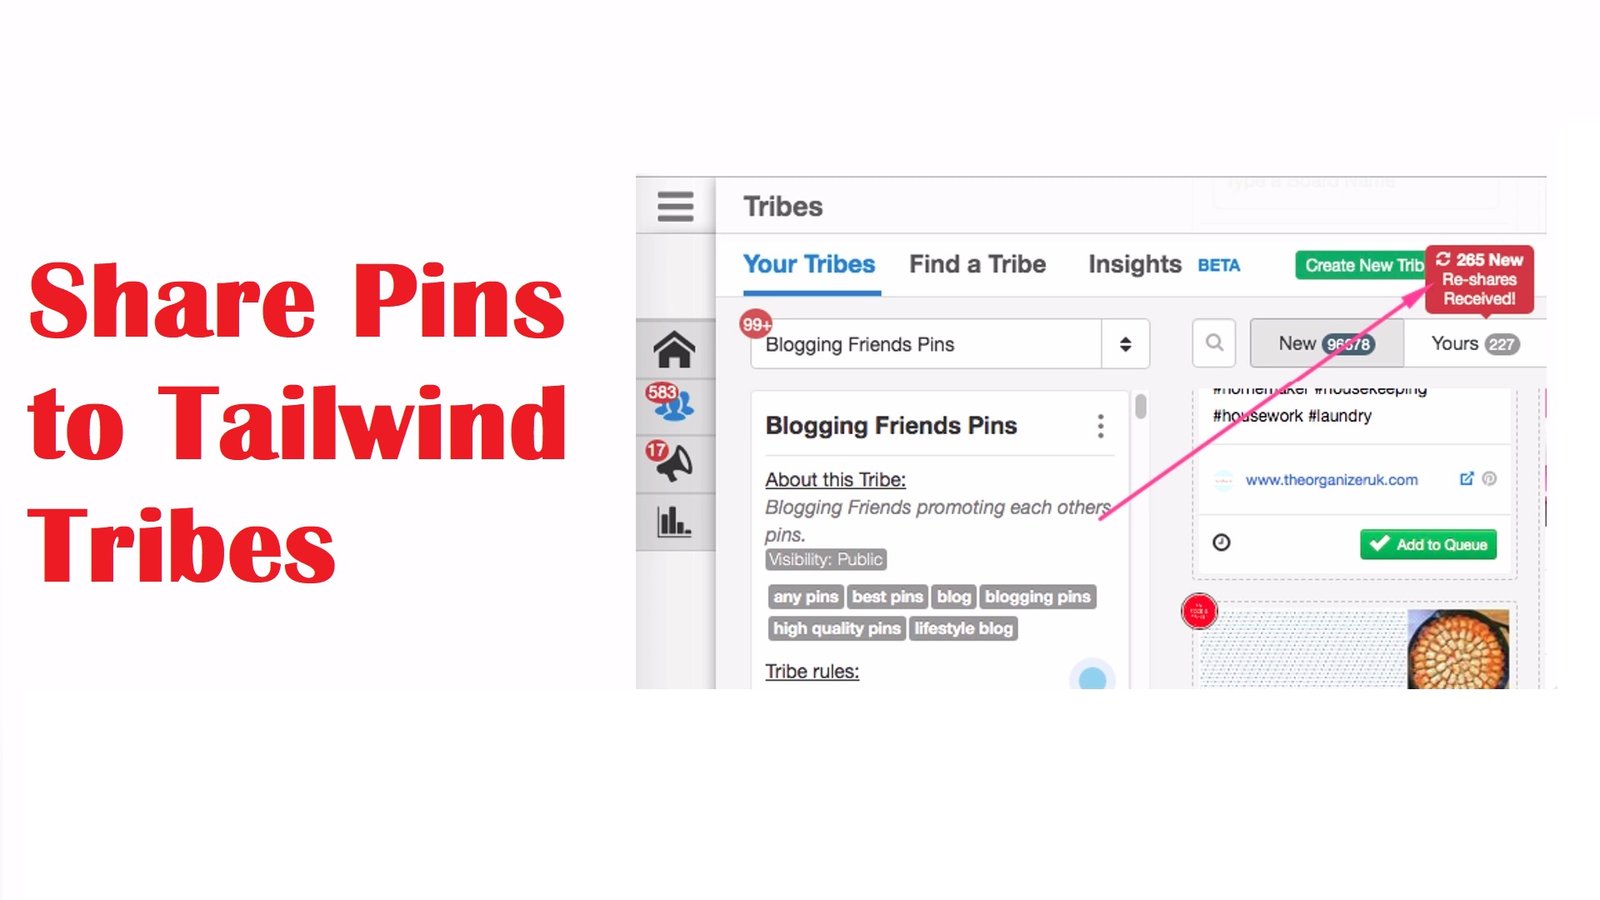
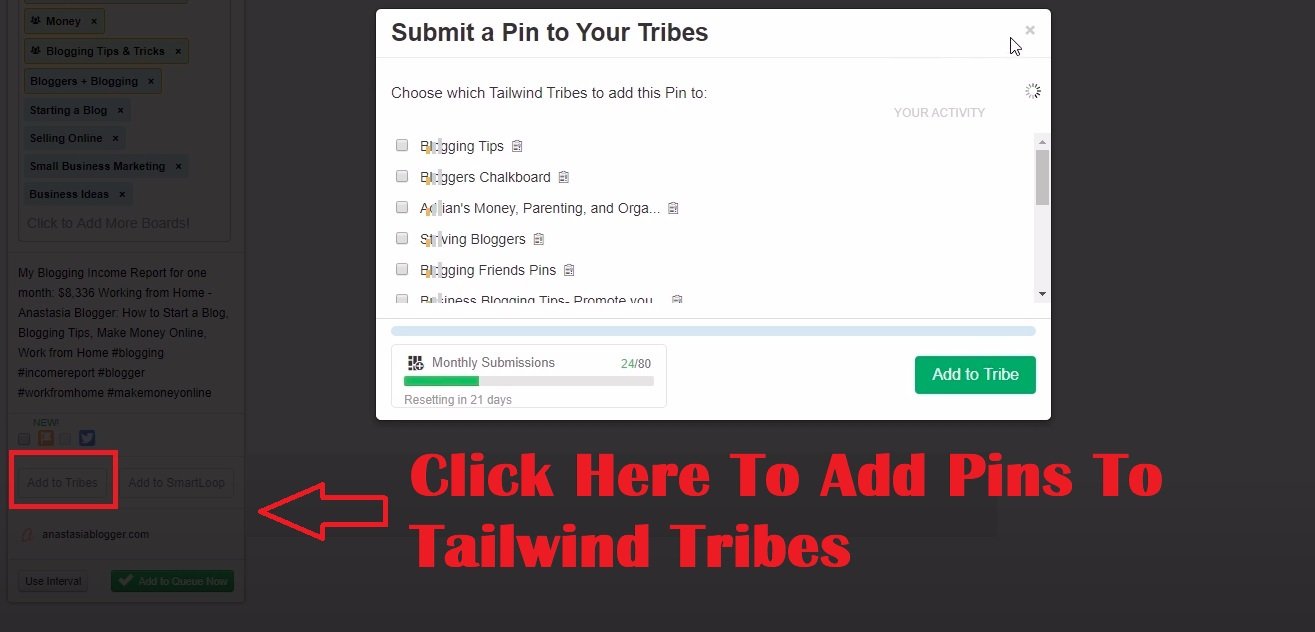
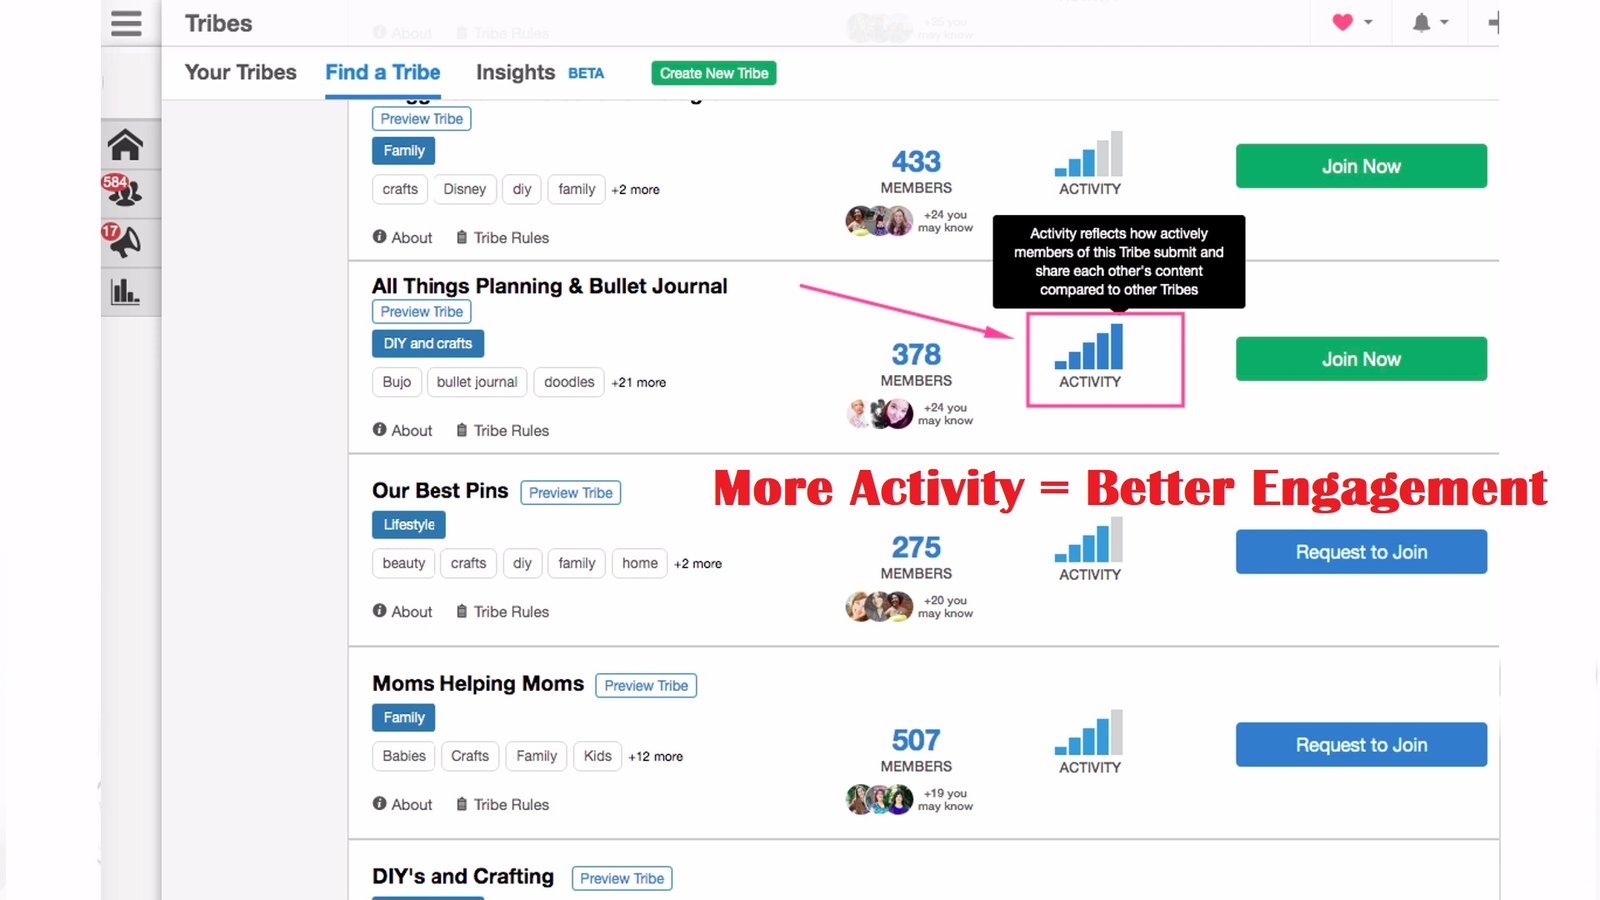
For saving pins of other people, you can use Tailwind Communities. When you save third-party pins from Pinterest manually, there might be a risk of saving some stolen pins. It’s really hard to verify the source of every image before repinning it.

Since Tailwind Communities are moderated manually by the admins of the Communities, spammers usually don’t get into Communities. This means that the majority of pins from Communities are safe for pinning.

Tailwind Scheduler vs Manual Pinning

1. Schedule Multiple Pins In Advance In One Session.

One of the key advantages of using Tailwind over manual pinning is that you can schedule multiple pins in advance in one session.

It’s no secret that Pinterest rewards you for being consistent on the platform. But on Pinterest consistency is not just a few pins a day! It’s actually at least 10 times a day, better if you can get closer to 30 pins a day.

So if you have other things to do during the day such as running your business, or creating new content, then being consistent on Pinterest manually can become a bit of a hassle.

Tailwind-create-review-advance-scheduling
Multiple Pins Scheduling In Advance

2. Tailwind Tracks The Best Times For Engagement.

The second thing is that Tailwind tracks the best times for engagement with your audience. And the tool suggests the time slots when you should pin more often.

The green time slots in the image represent the best time slots for my audience.

This way Tailwind allows you to save pins in the hours when your audience is the most active, even if you live in a different time zone.

If I was only using manual pinning being in India, I would never be able to pin at the same time when my European and American audience is active on Pinterest.

Tailwind-create-review-tracks-best-time-for-pinning
Tailwind Suggests Best Times For Pinning

3. Tailwind Lets You Set Interval Between Pins.

Tailwind also creates a repeatable process for you without making your account look spammy. Because it allows you to set intervals between pins.

Now if you try to save the same pin manually to several relevant boards on your account and if you’re doing it back-to-back, this can be irritating for your followers and it might trigger Pinterest spam filters.

In the worst-case scenario, this can even get your account suspended for spam. But Tailwind allows you to set intervals between the repeats of the same pins and this creates a healthy mix of pins on your profile.

Tailwind-create-review-set-custom-intervals
Set Custom Interval Between Pins

4. Tailwind Shows Repin Counts On Pins

Tailwind will show you quality third-party pins which you can save to your boards. 

This feature is missing in Pinterest itself but in Tailwind, you can see a blue flame icon on top of every pin which shows you the number of repins the image has across Pinterest.

This feature makes saving pins of other people more reliable. And it will help you fill the gaps in the Tailwind schedule automatically using the most popular pins that people are probably going to engage more.

Tailwind-create-review-shows-repin-counts
Shows Repin Counts On Pins

5. Tailwind Lets You Share Pins to Tailwind Communities

Tailwind allows you to share your pins to Tailwind Communities and this means that your pins will be repinned by other users who have relevant boards in your niche.

Now if you are worrying that your recipe pins might get shared in fashion boards by people who do not have proper knowledge of Pinterest SEO, you need not worry.

When you are using Tailwind Communities, your pins are getting shared by people who understand the value of Pinterest SEO and they save your pins to relevant boards.

Tailwind-create-review-share-pins-tailwind-tribes
Share Pins to Tailwind Communities

6. Tailwind Provides Advanced Pinterest Account Analytics

Tailwind also provides additional analytics about the performance of your Pinterest account. Some of the metrics which you can see in Tailwind analytics, you will never find in your native Pinterest analytics.

For example, you cannot track your following number in your Pinterest native analytics. You can only see the latest following number but you cannot see how your following has grown over time.

There are other metrics like ‘Virality Score’, ‘Engagement Score’, etc. which give you more insights into your Pinterest performance but are missing on the native Pinterest analytics.

Tailwind-create-review-advance-pinterest-analytics
Get Advanced Pinterest Account Analytics

How To Add Pins To Tailwind?

There are mainly three ways of scheduling pins with Tailwind. The first one is you can schedule from your website directly.

The second way is to schedule pins that you’ve saved to Pinterest first. And the third way is to upload pins directly into Tailwind.

I personally almost never use the last one because it’s simply not as intuitive and not as easy technically as the first two methods.

To use any of the first two methods, you will need to have a Tailwind browser extension installed on your computer.

To install the Tailwind browser extension on chrome, just google ‘Tailwind browser extension’ and click on the very first result and then click ‘Add to Chrome’ button.

Now if you want to save anything from a website directly, just click on the Tailwind blue icon at the top right. It’ll show you all the images that are pinnable on the page.

Tailwind-review-chrome-extension
Tailwind Chrome Extension

From here, you can select one of the images and click on the ‘GO SCHEDULE!’ button. Then Tailwind will show you a list of boards to add that image.

Tailwind-create-review-select-group-boards
Select Relevant Group Boards To Add Pin

You can select multiple boards to save that image. Just make sure you add it to the relevant boards only. Here you’ll also have the option of sharing the image with ‘Tailwind Communities’ and add it to the ‘Smart Loop’ feature.

Tailwind-create-review-add-pins-to-tailwind-tribes
Add Pins To Tailwind Communities

Furthermore, if you have selected multiple boards for your image to appear, you can customize the interval between repins. 

Personally, to make it look not spammy, I use an interval time of 1 day.

Tailwind-create-review-set-pin-interval
Set Pin Interval

You can also determine the time for scheduling the first pin. To do this, click on the time getting displayed for the first pin, and then set the time as per your preference.

Then under ‘Schedule Preview’ you can choose whether to go with the default times or optimized times. Sometimes, I prefer to use the optimized timings but you can go either way.

Then just click on the ‘Set Interval’ button. After that, click the ‘Schedule Now’ button. And that’s it! You’re done.

Tailwind-create-review-set-optimize-time
Choose Optimized Timing

The second way of adding pins to Tailwind is by first saving the first pin on the Pinterest platform and then scheduling repins of that pin using Tailwind.

Open any pin on Pinterest that you would like to schedule and make sure to check the pin is working correctly. Take some time to go over the description, hashtags, links, etc.  

Then click on the ‘Schedule’ button at the top and the rest is the same as the first step.

Tailwind-create-review-add-pins-from-pinterest
Add Pins To Tailwind From Pinterest

Even though you’re creating the same kinds of pins in both of these methods, I actually prefer the second one more.

The reason is sometimes you might make some minor mistake in creating the pin title or maybe the link is broken.

If you’ve first uploaded the pin in Pinterest and then schedule it, you can just go to that pin, make the necessary changes, and the changes will reflect everywhere.

But if you’ve taken the first approach and want to modify the link of a pin, you’ve to go over each individual pin in your schedule and change it manually one by one. And trust me, that would be pretty frustrating!

Why Should You Use Tailwind SmartLoop?

Tailwind’s SmartLoop feature allows you to save the same pin to the boards you selected over and over again but within healthy anti-spam limits.

These anti-spam limits were figured out by Pinterest and Tailwind together and Tailwind has set this feature as a default in their service.

Tailwind recommends using SmartLoop for two types of content:

The first one is seasonal pins which you need to reshare once or maybe twice a year. This way you don’t have to remember about those old pins and search for them in your Pinterest account because it was so a long time ago.

You can set those seasonal pins in the loop once you save them the first time and they will be reshared the next time your season comes.

The second reason for using SmartLoop is to reshare your old pins because you want to show your old pins to your new followers.

Pinterest and Tailwind recommend doing this not more than once every 3 to 6 months.

Tailwind SmartLoop Feature

If you were worried about going against Pinterest spam policy when you’re saving the same pin to the same boards more than once, you can just use the SmartLoop.

SmartLoop will show you the default settings to reshare your pins properly. Since Tailwind is an authorized Pinterest scheduler, their team has already got all the necessary approvals from Pinterest.

So if you set your pins in the SmartLoop too close to each other, Tailwind will show you a warning like the image below which explains that you shouldn’t save the same pin to the same board more than once in three months.

Tailwind-review-smartloop-spam-warning
SmartLoop Spam Warning

Are Tailwind Communities Worth It?

Yes, for me, joining Tailwind Communities has been definitely worth my time. Tailwind Communities are actually different from group boards on Pinterest.

When you submit your pins to Tailwind Communities, you’re not actually saving them to any Pinterest boards. You’re just sharing your pins in communities of content creators just like you who joined communities based on the niche or topic.

When you save something to a group board on Pinterest it actually is pinned on Pinterest.

The second difference is that Tailing Communities allow community owners or admins to track reciprocation and most of the communities require at least one repin for every pin you submit.

Tailwind Community system also gives you tools to track how much you have reciprocated yourself. It helps you keep a healthy balance between the promotion of your content and content curation on Pinterest.

Tailwind Communities take some time for reciprocation and they can be quite costly if you decide to upgrade for extra communities above the default include five communities.

You should know that people have different experiences with communities and it all depends on the niche and on the communities which they have joined.

All the communities have different communities of bloggers. Some communities are very active and some communities are pretty much dead.

Tailwind-create-review-tribes-activity
Tilwind Communities Activity Metrics

In some communities, you will see a lot of activities every single day so before you join communities, you can actually see their overall engagement rates.

You can also join or maybe leave communities over time if you see that some of them are not really active and not helping you to get a higher reach on Pinterest.

You’ll have the statistics once you start promoting in communities. These statistics won’t show up from day one but gradually you’ll see which communities work best for you inside your account.

How To Create Pinterest Pins Using Tailwind Create?

In this tutorial, I’ll show you how you can create engaging Pinterest pins really fast using Tailwind Create.

Tailwind Create is an advanced feature within Tailwind’s paid Pinterest solution and as such, is free for users on Tailwinds Pinterest Plus plan.

The lowest included tier for new users allows you to craft up to 15 designs per month and favorite up to 5 designs per month.

It also gives you access to quite an impressive pool of stock images, a library full of basic elements and graphics, plus drag & drop editing functionality and more.

Step 1: Create A Free Tailwind Account

Go to tailwindapp.com and click on the ‘Free Trial’ button at the top. Don’t worry, you won’t be needing your credit card to sign up for their ‘Free Forever’ plan.

tailwind-create-review-signup
Tailwind Signup Page

Sign up with your Pinterest account and once you are done with that, head over to your dashboard and click on the ‘Tailwind Create’ button (brush icon on the left side).

Tailwind-create-review-dashboard
Tailwind Dashboard

Step 2: Provide Images To Create Pins

Under the ‘Design Gallery’ tab, on the left side, you’ll see ‘Design Settings’. Here you need to provide photos so that Tailwind Create can design pins for you.

There are three ways you can do this. You can upload photos manually by adding them or include the site URL from where you would like to import images.

The third way is to use the ‘Stock Photos’ option. If you are uploading images manually, aim to upload at least three to five images – even better if you can upload eight or more so that Tailwind Create has more options to blow you away with their design suggestions.

Tailwind-create-review-add-photos
Add Images For Design

On the right side, you’ll see a lot of various pin designs that generate automatically. Under ‘Post Types’, you can select whether you want it to be a ‘Pin’ or ‘Feed Post’.

By the way, you don’t need to think about the perfect pin size. Tailwind Create uses Pinterest’s recommended dimensions by default.

When you are scrolling down to check out all the generated designs, it’s easy to get stuck in decision paralysis. To solve this, head over to ‘Categories’ and choose what type of Pins you want to generate.

You can use the various options under ‘Categories’ to filter out the pin designs that are not appealing to you and this way it would be easier to select the pins that you’d want to review. 

Step 3: Add Title Text And Color Palettes For Pins

Under ‘Text’, you can add the ‘Title Text’ for your pin designs and it’ll update the pins on the right side in real time.

You can also add subtitles if you want and add a ‘Call To Action’ button on your pin designs. There are a lot of fonts to choose from. If you want, you can also upload a custom font.

Tailwind-create-review-add-title-text
Enter Your Title Text

Next, under ‘Color Palettes’, you can choose various color palette options for your pin designs and it’ll again update the pins on the right side in real time.

There is a bookmark option for the color palette designs that you’ve selected so that you can make it your brand color palette.

Tailwind-create-review-add-color-pallete
Choose Color Palettes

Step 4: Add Website / Brand Name

Under ‘Branding’, you can add your brand name if you have one, and it’ll show up on your pin designs. If you wish, you can also add your brand logo to your designs to give them a more professional look.

Click on the ‘add your Logo’ link under ‘Branding’ and you’ll be redirected to a page where you’ll get the option of uploading your logo.

Tailwind-create-review-add-brand-name
Add Branding To The Pins

If you want to change the look of the designs, simply click the ‘Shuffle layouts’ and ‘Shuffle colors’ buttons below the images and play around by changing the colour focus, using a different photo or changing the layout.

If you want to go crazy on your designs, which I think isn’t really necessary as they already look incredible out of the box, you can fine-tune them further. To do that, click the ‘Edit’ button under the images.

Tailwind-create-review-shuffle-layouts
Edit Your Pin Designs

Depending on your choice in the previous step, you can now add text, objects, images or graphics to your pins. To do that, go to the options on the inner left-hand side and click the things you want to add.

Then go to the outer right-hand side and format or edit single objects in more depth.

Make sure that you’ve clicked the element on your pin that you want to tweak beforehand. Once you’re happy with your changes, click the ‘Save and Go Back’ button at the bottom.

Tailwind-create-review-edit-photos
Further Edit Your Pin Elements

To add a design to ‘Favorites’, simply hover over the image to ‘heart’ it.

Now choose your favorite images by clicking the ‘+ Select’ button to add them to your review selection. Once you are done, click on the ‘review’ button.

Select Pins For Scheduling

Step 5: Review Pins And Schedule

Click on the ‘Review Your Selection’ tab at the top and check that everything is correct when it comes to your pins.

If everything looks good, click on the ‘Go Schedule’, or the ‘Download’ button if that’s what you want to do.

Tailwind-create-review-go-schedule
Select Pins For Scheduling

Your eye-catching designs are now in the ‘Drafts’ area of the ‘Publisher’ tab.

Congrats! You’ve just created your very first pin designs with Tailwind Create.

All that is left for you to do now is to schedule it and you already know how to do it!

Tailwind-create-review-publisher-draft
Schedule Draft Pins

How Much Does Tailwind Cost?

Now let’s go over the different Pinterest pricing plans. I’ll go over what each Tailwind pricing plan has to offer so that you can choose the best plan for your business.

Thinkific offers the following four plans:

      • Free Forever $0/month
      • Pro Plan – $19.99/month ($9.99/mo paid annually)
      • Advanced Plan – $39.99/month ($19.99/mo paid annually)
      • Premier Plan – $79.99/month ($39.99/mo paid annually)
Tailwind-review-pricing-plans
Tailwind Pricing Plans

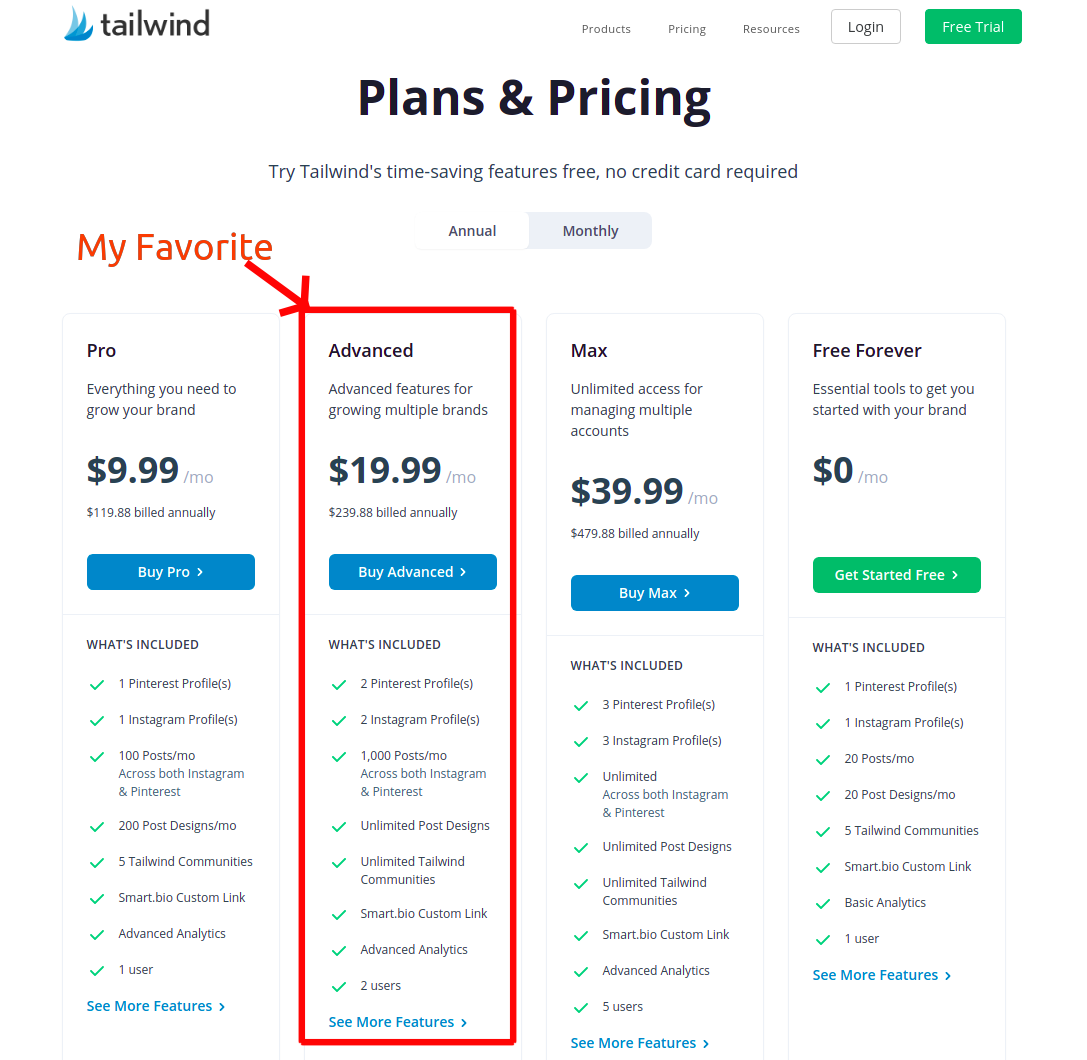
As a new blogger, you can start with the ‘Free Forever‘ plan just like I did, but let me tell you that, this plan is good for getting familiar with the system and learn the ropes, but you won’t be seeing a significant rise in your blog traffic.

So, I recommend that after a few weeks of using the Free plan, you should get into the Pro plan. You can use Tailwind’s addons to add more Tailwind Communities to your pro plan. You can add 5 communities per $4.99.

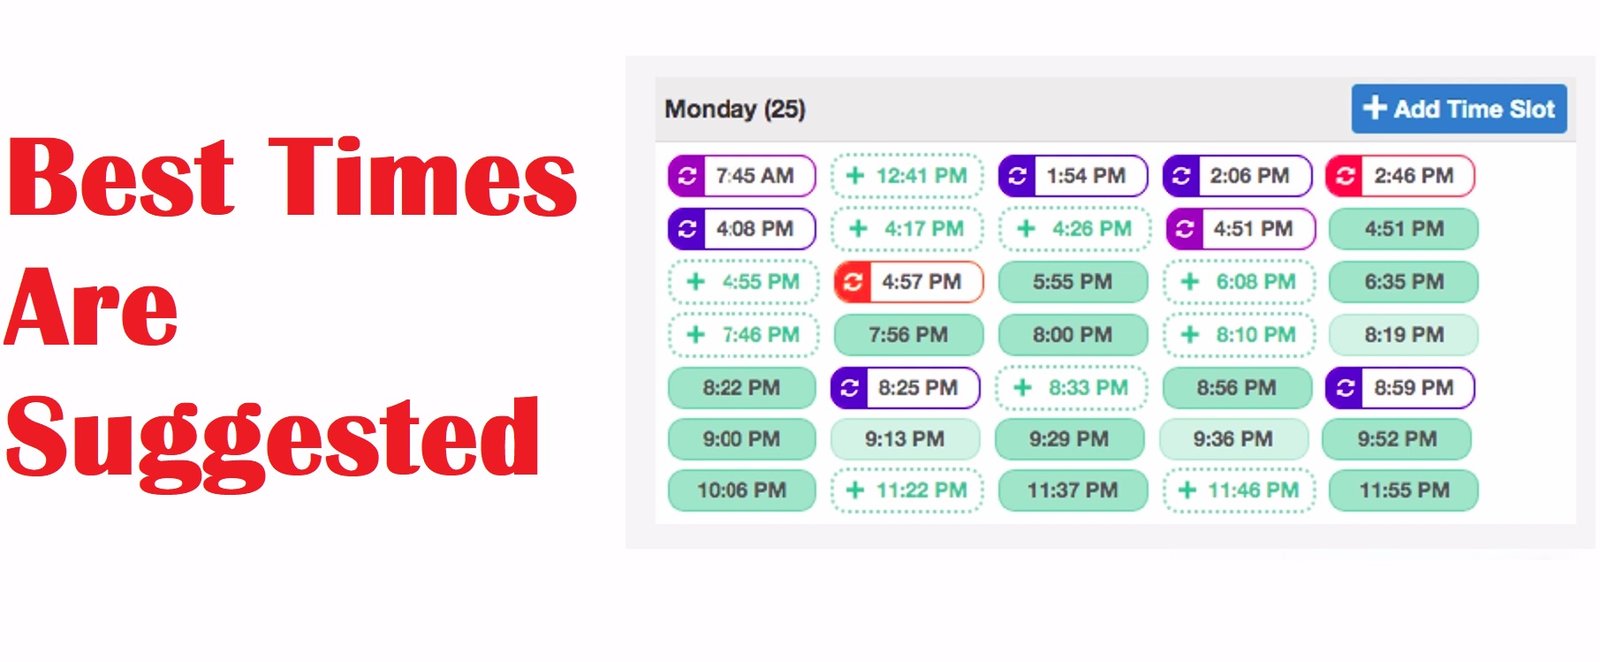
You will soon notice that in the Pro plan, you can schedule only 100 posts/month. But if you remember, to see a significant rise in blog visitors, we need to post daily 10-30 pins per day.

That is why I think going with the ‘Advanced’ plan is the best decision for a blogger whose primary motive is to significantly increase the blog traffic and page views.

With the ‘Advanced’ plan, not only you get to join unlimited Tailwind Communities, which are essential to your blog’s growth, but you can schedule 30+ pins per day across 2 Pinterest accounts which will bring a lot of traffic to your blog.

The Max plan is designed for high-tier bloggers and agencies who require the best version of what Tailwind can provide.

If you want to remove the restriction of how many pins you want to schedule per day across your Pinterest and Instagram accounts, this is the best plan for you.

As a new blogger, once you start seeing results and start generating significant income from your blog, you can switch to the Max plan and make Pinterest your primary traffic source.

Wrap Up & Final Verdict

I highly recommend Tailwind for anyone who wants to increase their page views and blog traffic. Yes, you can go for the manual scheduling route, but you’ll end up spending your whole day on Pinterest, and it won’t be consistent over time.

As a new blogger, initially, I wasn’t thrilled to spend money on Tailwind as my blog wasn’t making any money.

But it’s a hard truth to learn that you need to spend money to make money.

Before Tailwind, I ended up spending a lot on Pinterest managers and ads. But I changed my mindset and thought of the Tailwind’s cost as an investment to my business. And I’m glad I made that decision.

You need to treat your blog as a business, otherwise, it just becomes a hobby blog from where you don’t generate significant income. 

In the long run, Tailwind’s cost is far less with promising results than what you would spend on a digital marketing agency.

The best way to know whether Tailwind is the right scheduling software for you is to go for their ‘Free Forever‘ plan first, and then upgrade your service if you can justify it through your increased blog traffic.

I hope this article and tutorial gave you an insight into what Tailwind is all about and how easily you can start creating pins using Tailwind Create.

Do let us know in the comments how was your experience with Tailwind, what you liked about it, and what should be improved to make it better!

tailwind-create-review

If you find this article helpful, kindly share it with your friends. You may also Pin the above image on your Pinterest account. Thanks!

Quick Tailwind FAQs

Is It Safe To Use Tailwind?

Yes, Tailwind is safe and legit. Tailwind is officially approved by Pinterest.

How Long Is Tailwind Free?

Tailwind is free as long as you want it to be free. You only need to pay if you decide to go for extra features that are included in the paid plans. 

You can use their ‘Free Forever‘ plan to check out the features offered by Tailwind.

Is Tailwind Mobile Friendly?

Yes. Tailwind offers an app for mobile users. It works on both iOS and Android devices.

Do I Need A Credit Card To Join Tailwind?

No, you don’t need to enter your credit card (or debit card) details in order to use their ‘Free Forever‘ plan. You just need a Pinterest or Instagram account.

Which Payment Methods Does Tailwind Accept?

Tailwind accepts MasterCard, Visa, American Express, Discover credit cards, and Paypal.

Does Tailwind Have A Money Back Guarantee?

Unfortunately, no. Tailwind doesn’t provide refunds for partially used subscription periods. If you cancel your Tailwind account, they will honor your service plan for the remainder of the period you’ve already paid for. 

Abhigyan Mahanta

Abhigyan Mahanta

Hi! I’m Abhigyan, a passionate remote web developer and writer with a love for all things digital. My journey as a remote worker has led me to explore the dynamic landscape of remote companies. Through my writing, I share insights and tips on how remote teams can thrive and stay connected, drawing from my own experiences and industry best practices. Additionally, I’m a dedicated advocate for those venturing into the world of affiliate marketing. I specialize in creating beginner-friendly guides and helping newbie affiliates navigate this exciting online realm.

You might also like: