How To Get Approved For Affiliate Programs Even With A New Site
You built a site, picked a few programs, and sent your applications. Then the rejection emails came back, and many of them gave no reason at all.
That stings, especially after weeks of work. It also leaves you guessing about what went wrong.
Reviewers want to see that a real person runs a finished site on a topic that fits the brand. The 8 steps below go in order, and each one sets up the next.
The steps are our advice for new sites, and every program has its own rules. Always read the current terms on the program's own page before you apply.
Disclosure: Some of the links I share might be affiliate links. If you click on one and make a purchase, I may earn a small commission as a thank you. But don’t worry, it won’t cost you anything extra. I only recommend stuff I genuinely believe in. Your support helps me keep creating awesome content. You can read my full affiliate disclosure in my disclaimer page.
Search 1,500+ affiliate programs in the Blogsepaise Program Database and filter them by category, network and commission type, then go straight to each program's signup page. The Link Health Monitor then checks your posts for broken, redirected and untagged affiliate links.
Why Affiliate Programs Say No To New Sites
An affiliate program is a business deal, and the brand wants to know who it is dealing with. A reviewer has your link and a short time to decide.
Networks such as Awin and PartnerStack sit between you and many brands. You usually apply to the network first, and then to each brand inside it.
That can mean two rounds of review. Awin says an application can be declined for one or more reasons, and PartnerStack says it approves partners before they can apply to marketplace programs.
Rejection in one round does not mean rejection in the other. A network may accept you while a single brand says no.
Do not take one no personally. Look for the pattern across several replies, because a pattern points to your site and a single reply may point to that one brand.
Fixing the site before the first application is easier than fixing it after. Our guide on traffic requirements for affiliate networks shows what networks ask for.
The plan below is simple. Learn what reviewers check, fix your site, pick programs in a smart order, apply well, and handle the replies.
Step 1: Learn What Reviewers Check Before You Apply
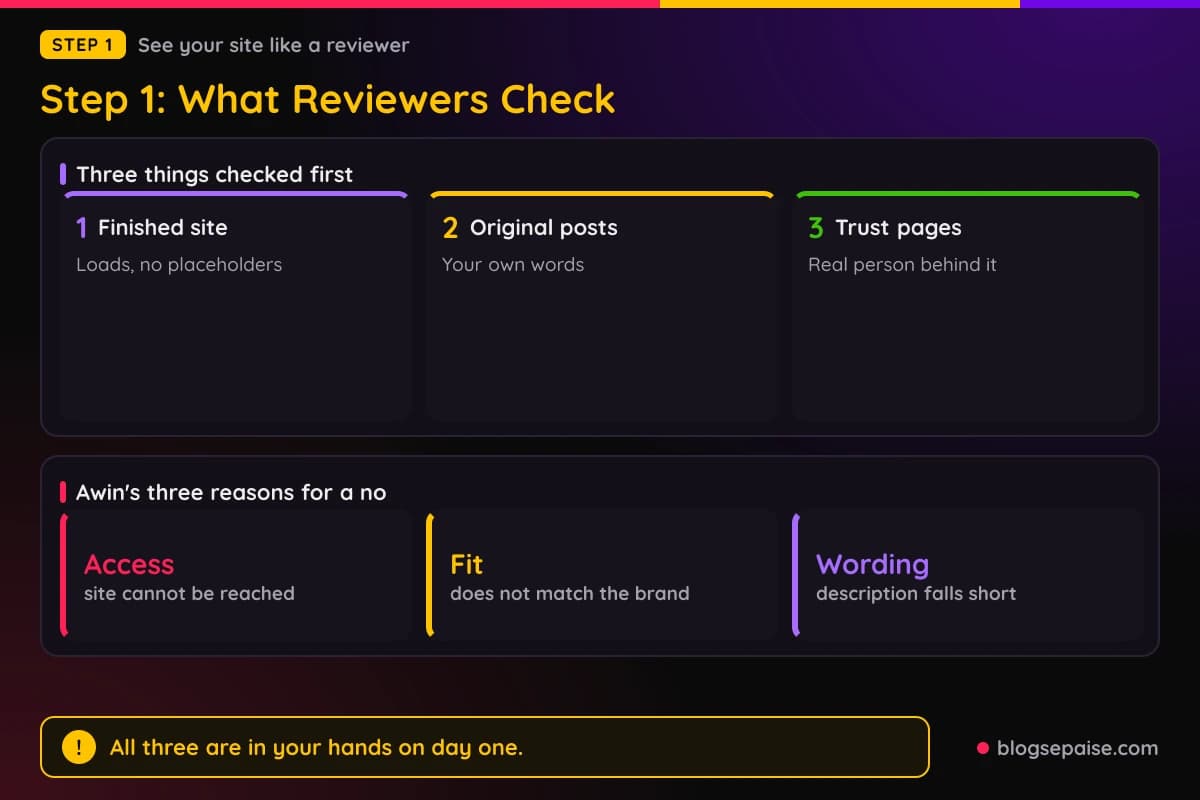
Start by seeing your site the way a reviewer does. Open it in a private window on a phone and on a laptop, with no logins and no saved settings.
Check that every page loads and looks finished. Broken pages, placeholder text, and coming soon notices make a site look unready.
Check that the topic is clear. A site that jumps between unrelated topics is a weak match for any brand.
Check that your content is your own. Copied or lightly rewritten articles give a reviewer no reason to approve you.
Check for signs of trust. A named author, an about page, a contact page, and a privacy policy all help show who runs the site.
Read the program terms for traffic rules too. Programs set their own rules on promotion methods, regions, and traffic, so our guide on how to read affiliate program terms is worth a look.
Awin tells declined applicants to check the advertiser's program description and terms first. For a reason tied to one program, it points you to the account manager listed on that advertiser's profile.
Ask a friend to open your site on their phone and tell you what it is about in one sentence. If they hesitate, a reviewer may too.
Fix what you find before you move on, because every later step relies on a site that passes this test.
Step 2: Build The Trust Pages Reviewers Expect
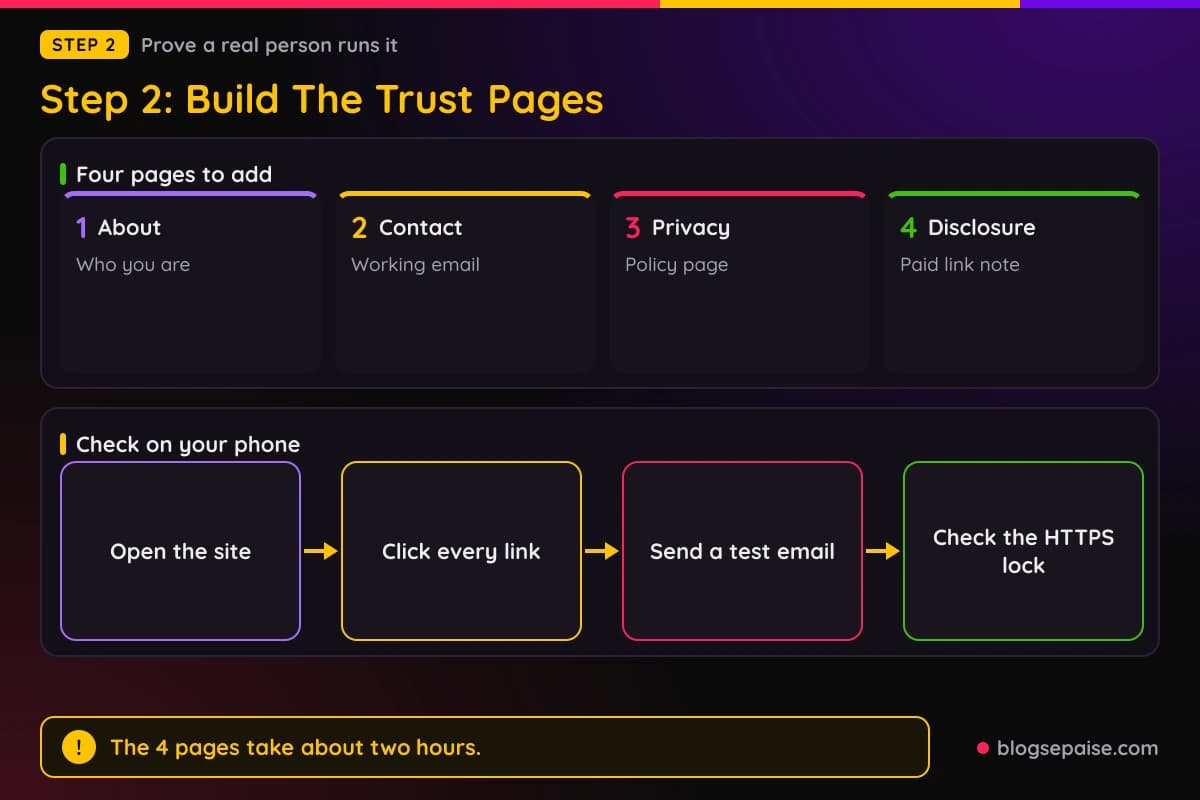
Trust pages are the plain pages that show a real person runs the site. Each page can be short if it is true and easy to find.
Start with an about page. Say who you are, why you write about your topic, and what readers can expect.
Add a contact page with a working email address. Test it by sending yourself a message.
Then write a privacy policy and a disclosure page. Our affiliate disclosure generator can draft the disclosure text.
Add a short note near your links too. The FTC says to disclose a material connection with a brand clearly, next to the endorsement itself and not in a profile or at the end of a post.
Amazon requires Associates to display this statement on their site: "As an Amazon Associate I earn from qualifying purchases."
Keep the design clean. Make sure every menu link goes somewhere and no page shows sample or placeholder text.
Check the site on a phone, since a reviewer may open your link on any device.
Remove anything that looks like an unfinished template, such as sample posts and default pages.
Step 3: Publish Real Content Before You Apply
Content is the proof. Reviewers cannot see your plans, only what is live today.
Choose a narrow topic first. Our guide to choosing a profitable niche helps you pick one.
Write for a real reader problem. A post on how to choose a standing desk fits a desk brand far better than a post about your week.
Write in your own words and from your own experience. Add real photos or screenshots where you can.
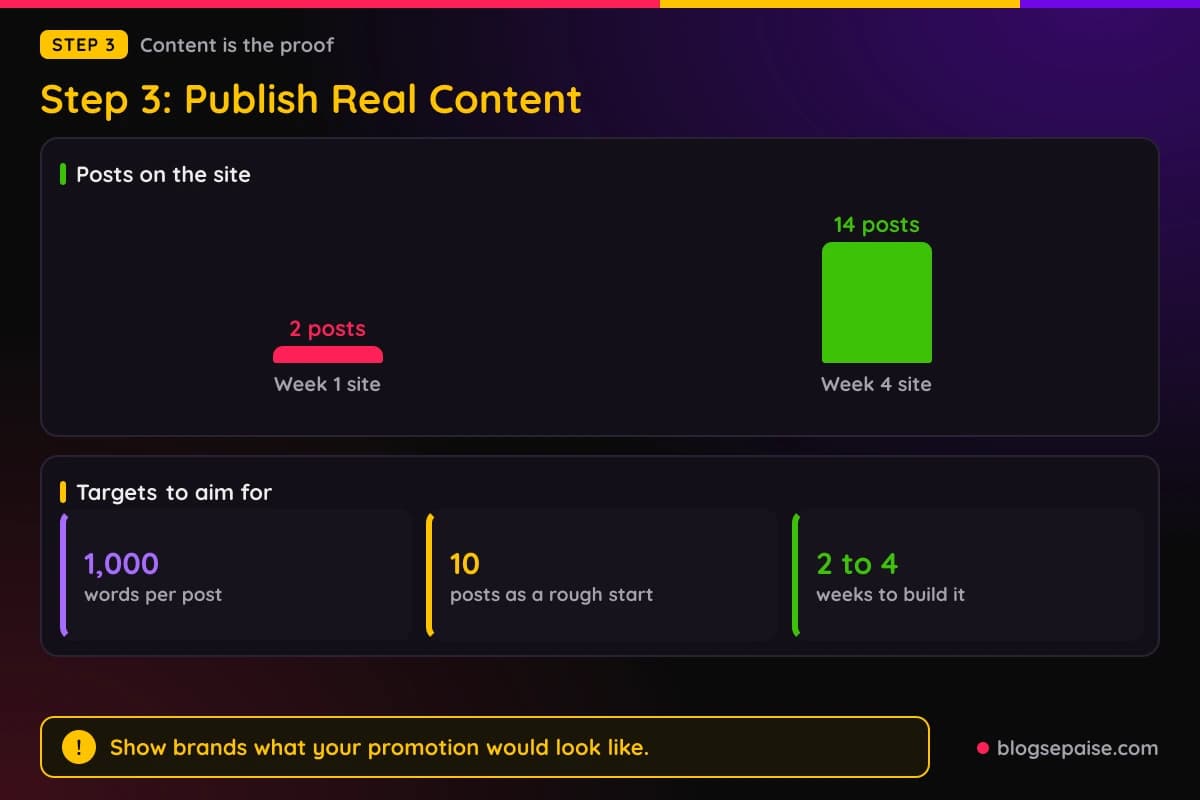
Mix post types. A few how-to guides, comparisons, and reviews show brands what your promotion would look like.
Keep affiliate links light at first. A site with no links yet is fine, and a site stuffed with links looks pushy.
Link to other posts on your own site, and make sure every post is public.
Cover the kind of products you plan to promote. If you want a software program, write at least one post that fits that type of software.
No program promises approval at a set number of posts, so aim for quality over count. Do not wait for big traffic either, since many programs judge the quality of what they see.
Step 4: Pick Programs In The Right Order
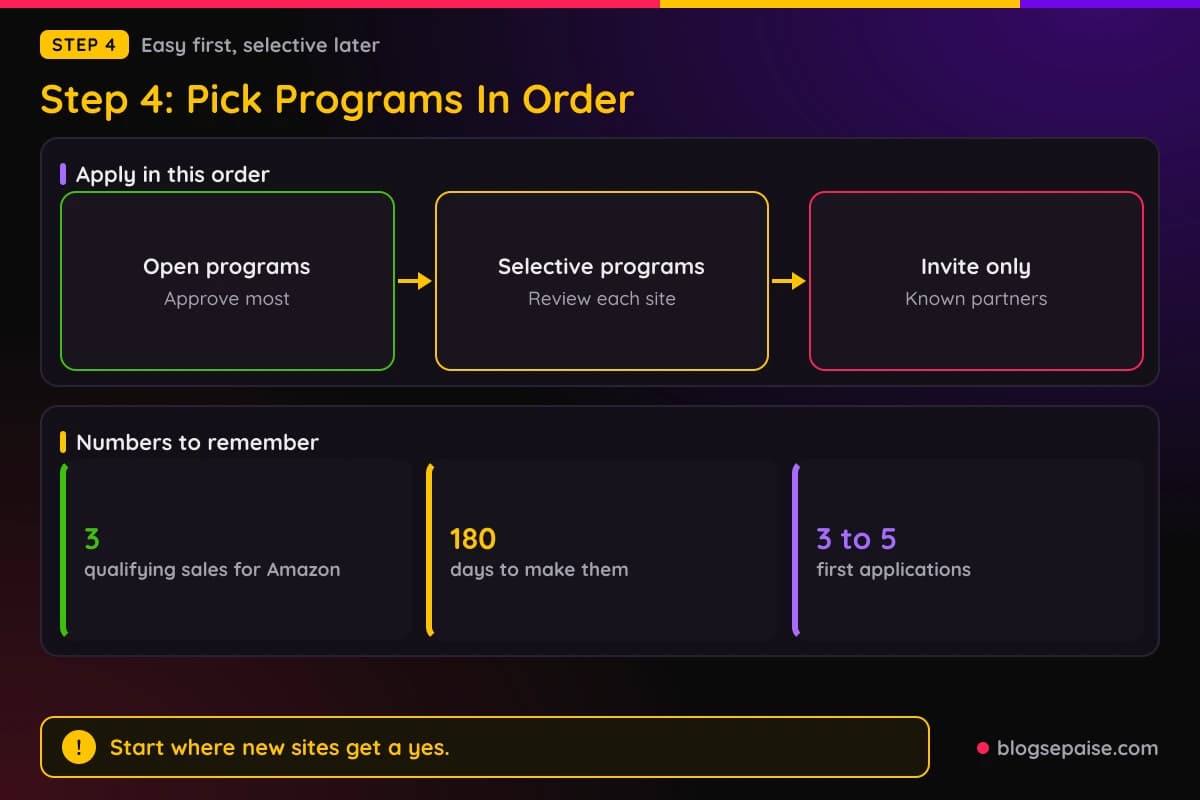
Do not apply everywhere at once. Start with programs that look open to new sites, then work up to more selective ones.
Applying in waves protects you. If your site needs a fix, only a few programs have seen the problem.
Amazon Associates has its own rule. Amazon says it reviews an application after the applicant has driven at least three qualifying sales within 180 days, and personal orders do not qualify.
Amazon also says an application can be withdrawn if there were not enough qualifying sales within 180 days of submission. Write buying guides, send readers to them, and mark the 180 days on a calendar.
Software programs on networks like PartnerStack are a common place for beginners to look. Our list of high quality affiliate programs is a good place to find candidates.
Pick programs that match the content you already have. Ask yourself if you could write a useful post about the product tomorrow without faking anything.
Start with a small first round so you can learn from the replies. Read the terms first, and look at allowed promotion methods and regions.
Skip programs with unclear terms or sky high promises. Our page on affiliate marketing red flags lists the signs worth avoiding.
Keep a simple sheet with the program name, the date you applied, and the reply. Patterns show up quickly.
Step 5: Join The Networks And Complete Your Profile
Networks cut down the work. One profile and one review can open the door to many brands.
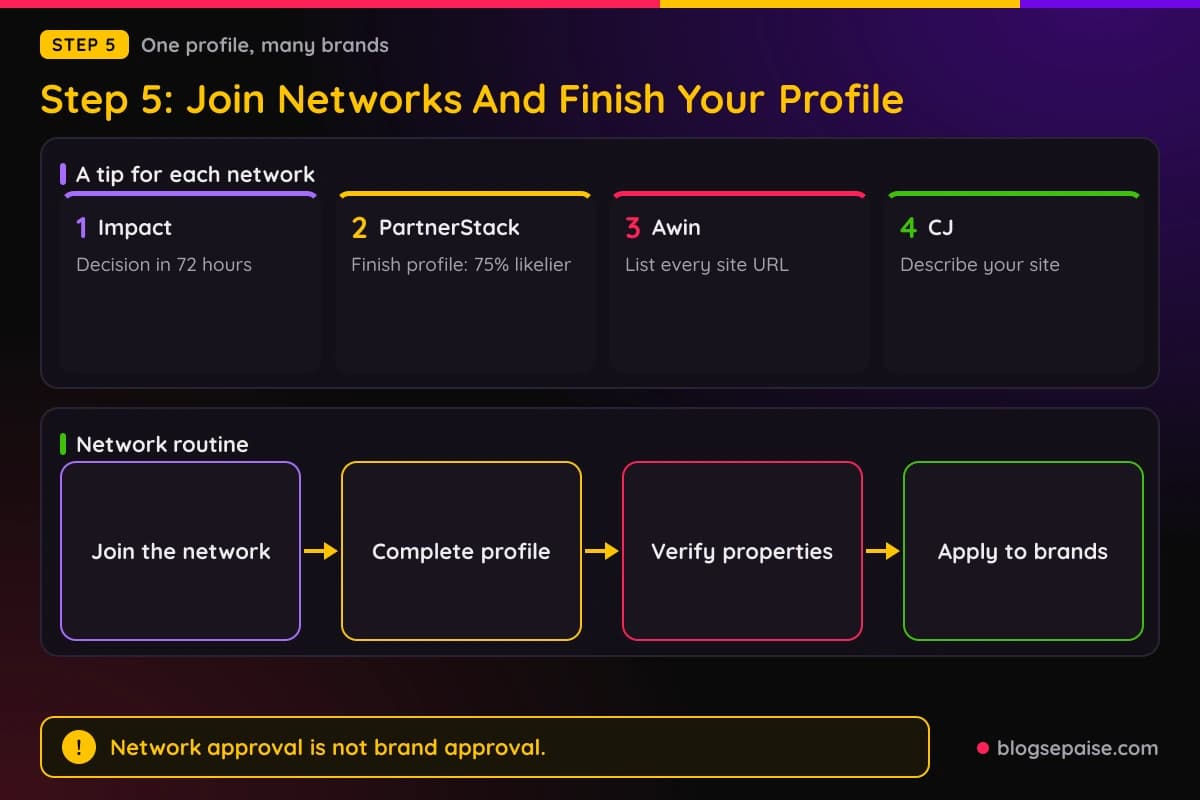
Impact's help center says it reviews marketplace applications for authenticity and compliance and gives a decision within 72 hours. It also requires at least one verified media property before you can join the marketplace.
PartnerStack has you join its network first. Its support article says a finished profile is tied to a 75 percent boost in acceptance odds, which is PartnerStack's own figure.
PartnerStack also says that if its team cannot match your LinkedIn profile to your account, that could be grounds for rejection. Use a sign-up email or business name that matches your profile.
Awin says submitting its application form may require a small sign-up deposit. Awin's publisher terms do not form an agreement if the application is rejected, so check the form you see for the current details.
Use the same name, email, and site details on every network. Fill in every field and write a short bio that names your topic, your audience, and your content types.
Add links to your best posts so reviewers have something concrete to open. Check your inbox and spam folder during review, since networks may ask for more information.
Network approval is not brand approval. Each brand reviews you on its own terms.
Step 6: Write An Application That Gets A Yes
Many forms have a free text box. That box is your chance to speak to a person.
Be specific. A line like "I run a blog about composting in small apartments" tells the reviewer far more than "I have a lifestyle site."
Name the content you plan to create, such as a comparison of products or a how-to guide for starters. A plan shows you are building something, not collecting links.
Say how you will promote, and only name channels you actually use.
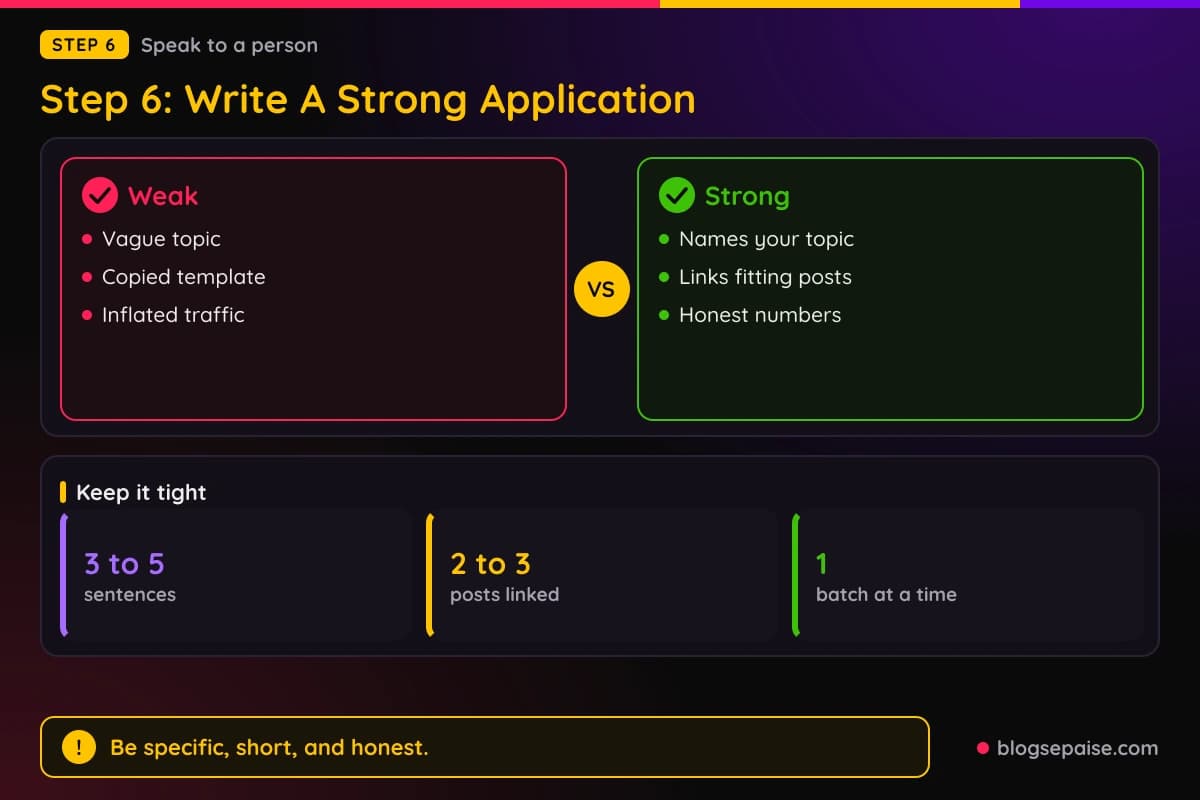
Link to the posts that fit the brand best, and pick the closest match instead of your newest.
Be honest about traffic. Misstating your numbers can get you rejected or removed later, and a small honest number costs less than a caught exaggeration.
Keep it short and specific, and match the brand's language. Do not paste a template from the internet, and proofread before you send.
Send a small batch, then wait for replies. Save a copy of each application so you can reuse the best parts.
Step 7: Handle Waiting, Rejections, And Reapplying
Approval times vary by program. Impact points to a decision within 72 hours for its marketplace, and the right timing for others is on their own pages.
Write the date of each application in your sheet so you know when to check back. Check your spam folder before you send a follow-up.
If you get a rejection, read it closely. Some include a reason, and many do not.
Awin says the exact reason for a program rejection has to come from the advertiser's account manager. A short, polite question is worth sending.
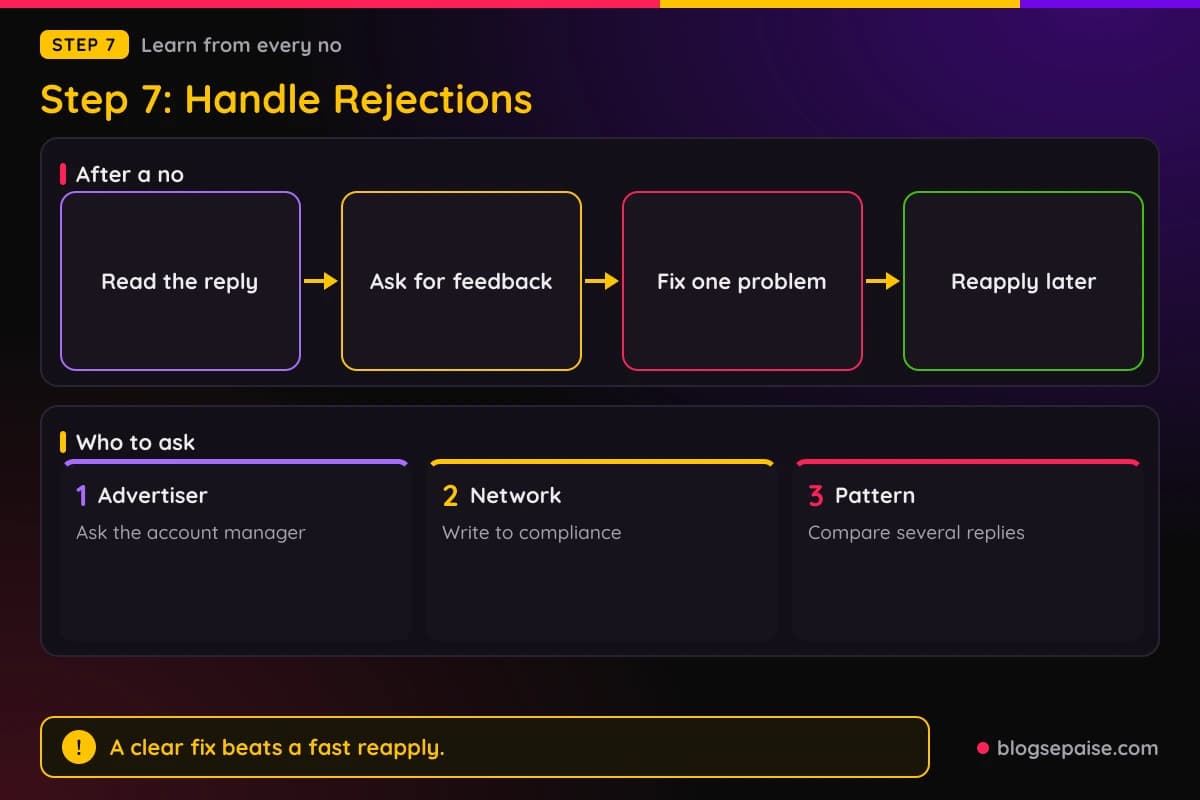
Network rejections work differently. Awin tells declined applicants to contact its compliance team with their ID, email address, and site URL.
PartnerStack says a declined applicant can reapply later. Use the replies to find the pattern, fix one clear problem at a time, and say what you changed when you reapply.
Keep your tone calm and apply to other programs while you wait. A no from one does not stop the others.
Step 8: Keep Your Approval After You Get In
Approval is not the finish line. Programs set rules for partners, and breaking them can cost you your account.
Disclose every affiliate link clearly. Put a short note before the first link in each post.
Do not buy through your own links, since Amazon says personal orders do not qualify. Follow each program's promotion rules and use your links exactly as given.
Our page on how to avoid getting banned from affiliate programs covers the mistakes that cost partners their accounts.
Post fresh content so the site stays active, and check each program's terms for rules on inactive accounts. Amazon has an Account Dormancy policy for inactive accounts.
Keep your notes current with dates, terms, and replies. They protect you if a program changes its rules.
Common Mistakes When Applying To Affiliate Programs
The first mistake is applying with an empty site. Reviewers judge what is live on the day they click.
Another is applying to many programs at once. You lose the chance to learn from the first replies.
Many beginners skip the trust pages. A missing about, contact, or privacy page makes it hard to tell who runs the site.
Some people copy articles or pick programs that do not fit their topic. Both waste your time and the reviewer's time.
Inflating traffic numbers is a risky move, and generic application text rarely helps. Ignoring the terms can also leave you promoting in a way the program does not allow.
Buying through your own links to test them is a common slip. Amazon does not count personal orders.
Last, do not give up after a few rejections. Fix the clear problems and apply again.
Final Thoughts
Getting approved with a new site comes down to proof. Show that you are real, that your site is finished, and that your topic fits the brand.
The path is short. Learn what reviewers check, add the trust pages, publish real posts, pick programs in order, apply with care, and handle the replies.
Start today with one honest look at your site on your phone. Write down every gap and fix the biggest one first.
Rules change, so check each program's current terms before you apply. For more on staying in good standing once you are in, read our page on how to avoid getting banned from affiliate programs.
Frequently Asked Questions
1. How long does it take to get approved for an affiliate program?
Times vary. Impact points to a decision within 72 hours for its marketplace, and other programs set their own timing.
2. Can I get approved with no traffic?
It depends on the program. Some set traffic requirements, so read each one before you apply.
3. How many posts do I need before I apply?
No program promises approval at a set number. Aim for real, original posts that fit the brand.
4. Why was I rejected with no reason?
Many programs send no details. Awin says the exact reason for a program rejection has to come from the advertiser's account manager.
5. Can I reapply after a rejection?
PartnerStack says declined applicants can reapply later. Fix the problem first and say what you changed.
6. How does Amazon Associates approval work?
Amazon says it reviews an application after at least three qualifying sales within 180 days of applying. Personal orders do not qualify.
7. Should I apply to many programs at once?
We suggest a small first round so you can learn from the replies and then add more.
8. Will a network approval get me into every brand?
No. Each brand reviews you on its own terms after the network accepts you.